01 First-floor office fit-out
From a rough sketch to a space you can walk through.
An early idea for a first-floor office, turned into a three-sheet drawing set and an interactive model that people can walk through, view from above and examine one building system at a time.
- Project
- First-floor office fit-out, proposed layout
- Started from
- A rough hand-drawn layout idea
- Delivered
- Interactive 3D model and a three-sheet A3 drawing set
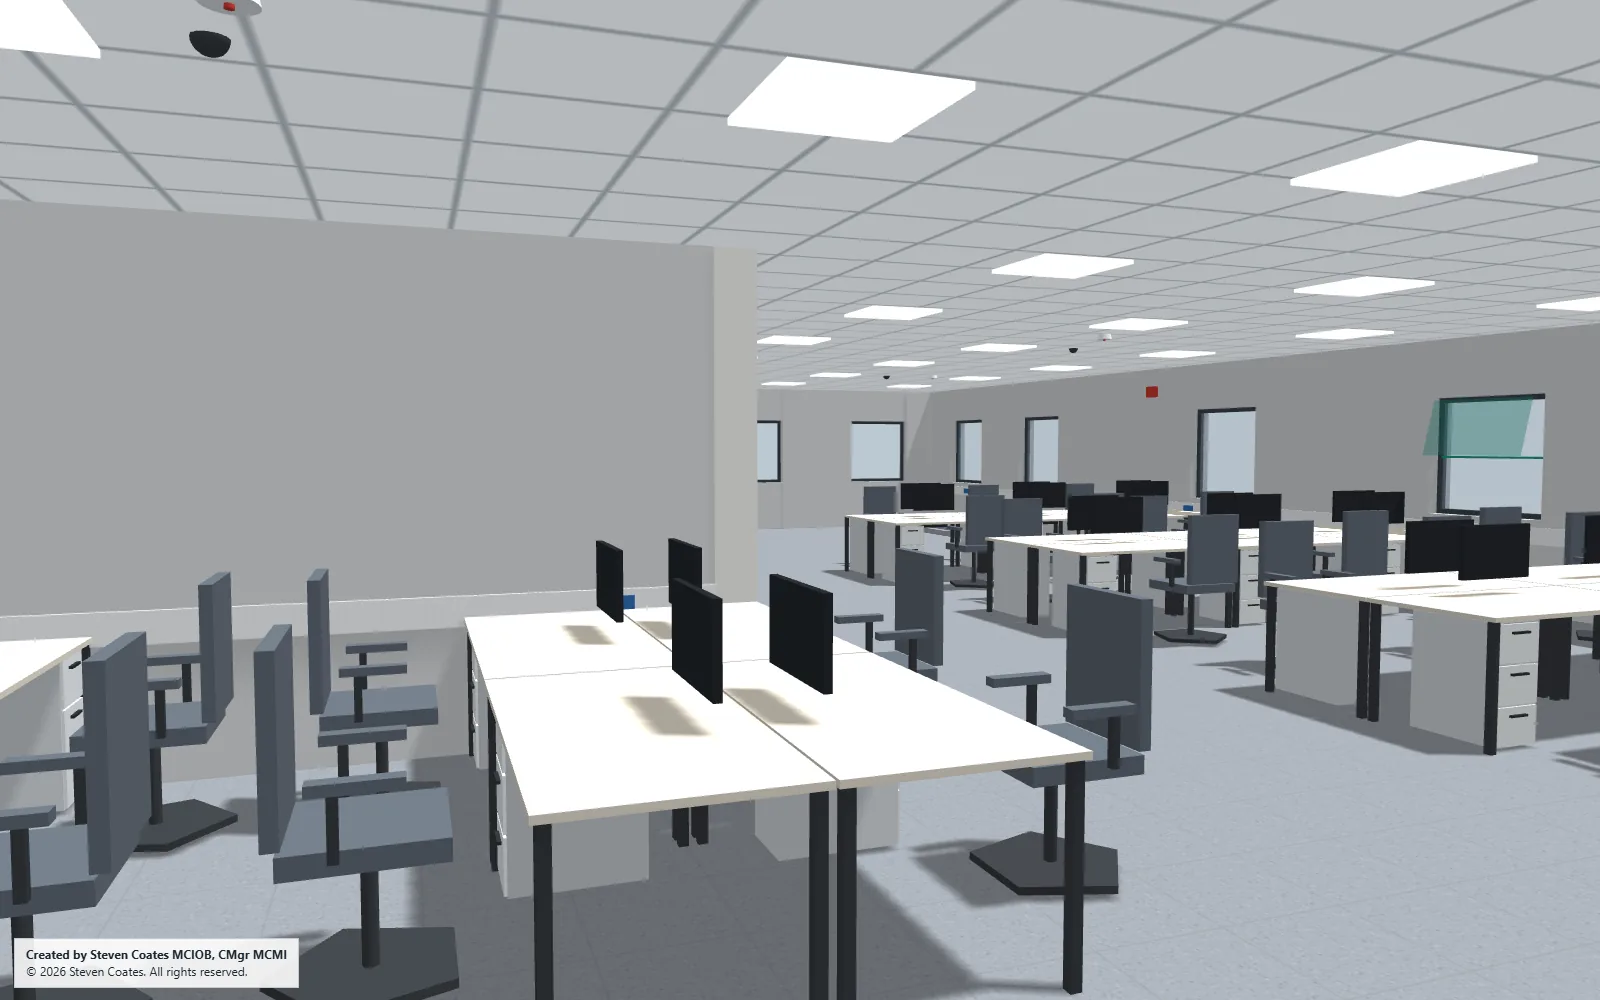
At a glance
- The problem
- The client knew how they wanted their first floor to work, but only had a rough hand-drawn idea to show for it.
- What we received
- A hand-drawn layout and the requirements for desks, a board room and a kitchen.
- What we produced
- A three-sheet A3 drawing set covering layout, power, ceilings, lighting and fire alarm, plus a 3D model you can walk through.
- What it helped the client do
- The team could review the layout, services and furniture at eye level and comment before anything was ordered or installed.
01 What we received
What landed on the desk
The project started with a rough, hand-drawn idea of how the first floor should work: where people would sit, where the board room and kitchen would go, and how it would all fit around the existing WCs, stair void and fire exit.
Some projects arrive with a survey and a coordinated drawing package. This one arrived as an idea. Both are a perfectly good place to start.
- A hand-drawn layout idea
- The existing first-floor shell: external walls, windows, stair void, WCs and fire exit
- The client's requirements for desks, a board room and a kitchen
02 What we understood
Turning an idea into firm spatial decisions
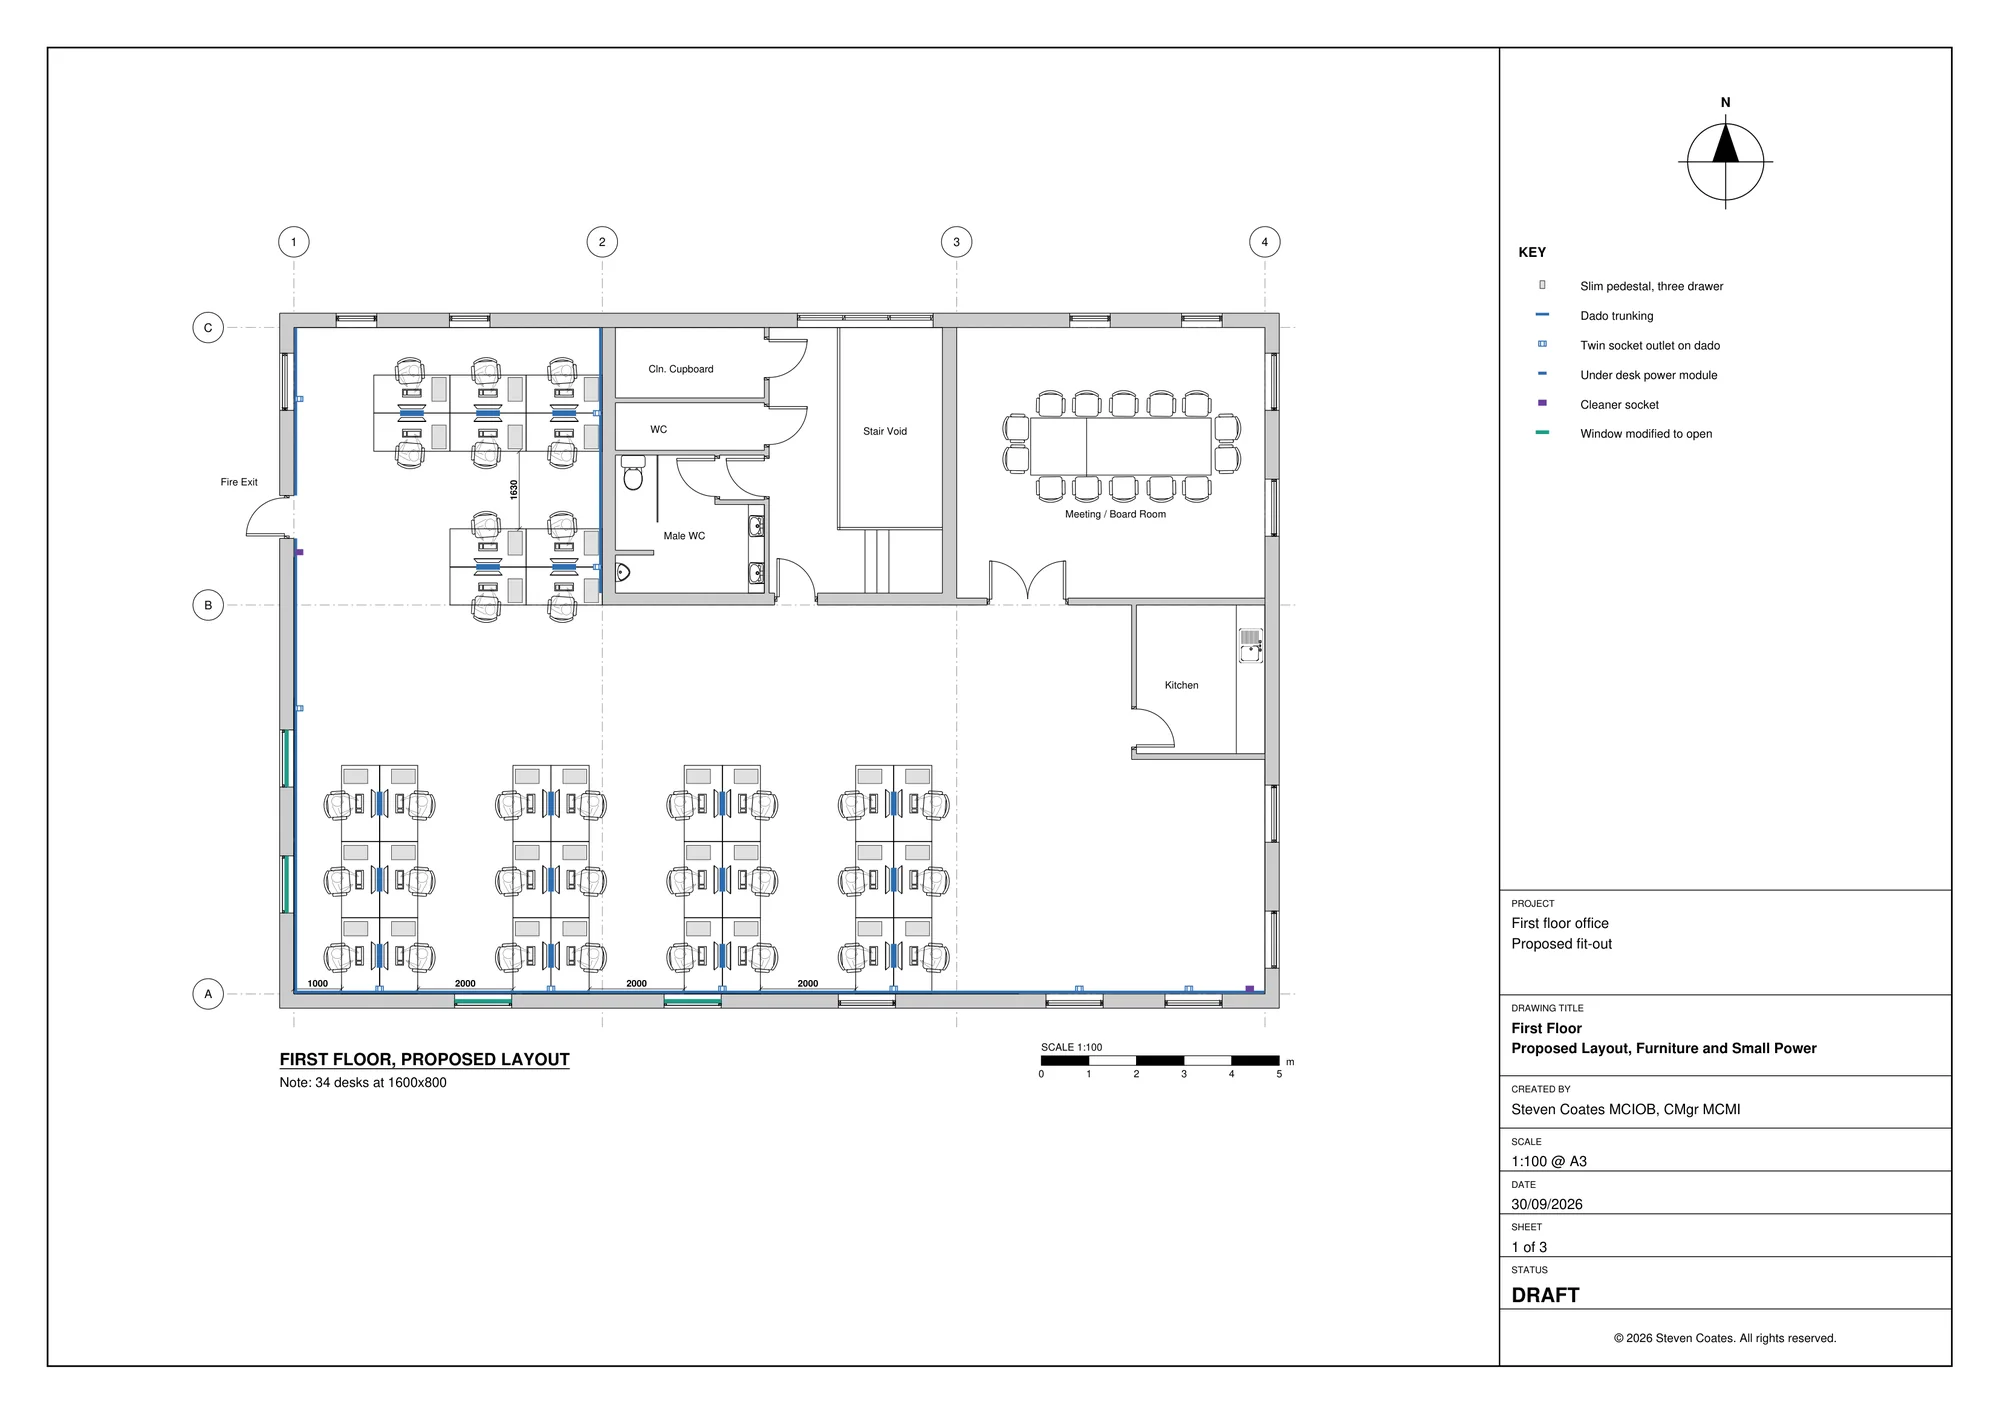
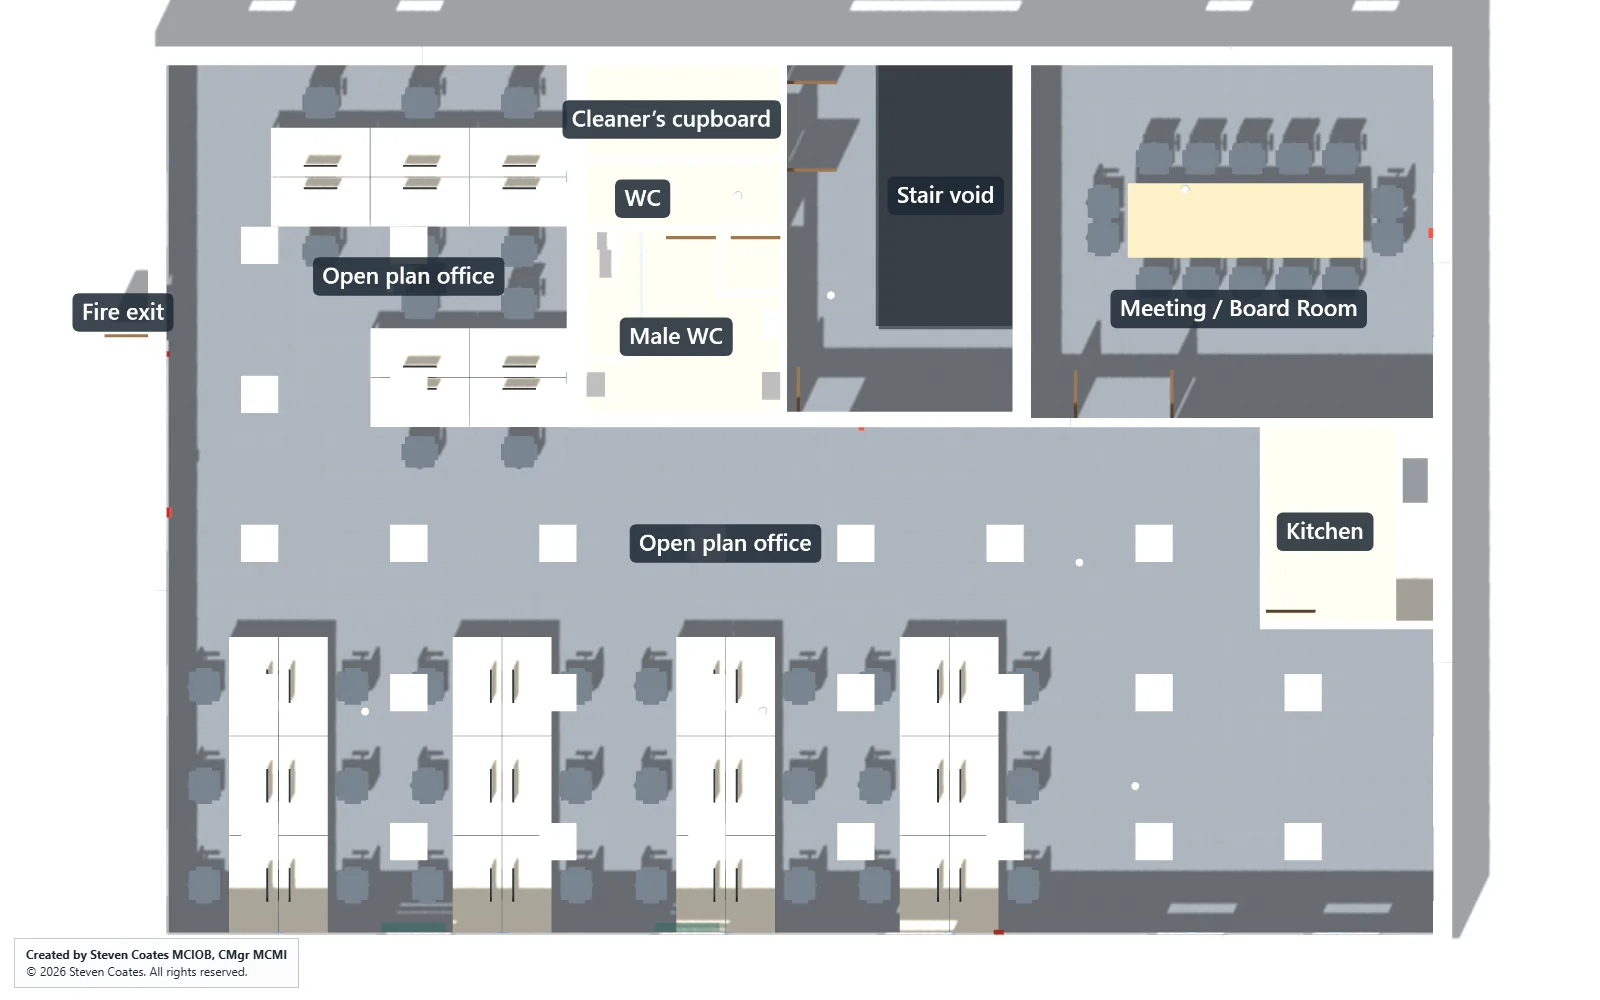
Before anything was modelled, the sketch had to become dimensions. The open-plan office was set out for 34 desks at 1600 x 800 mm in back-to-back banks on a 2,000 mm module, with the board room, kitchen, WCs and cleaner's cupboard fixed around the stair void and the fire exit.
The services followed the furniture, not the other way round, so that what people would see in the model matched how the space would actually be used.
- Dado trunking with twin outlets at each desk-bank end, under-desk power modules and cleaner sockets
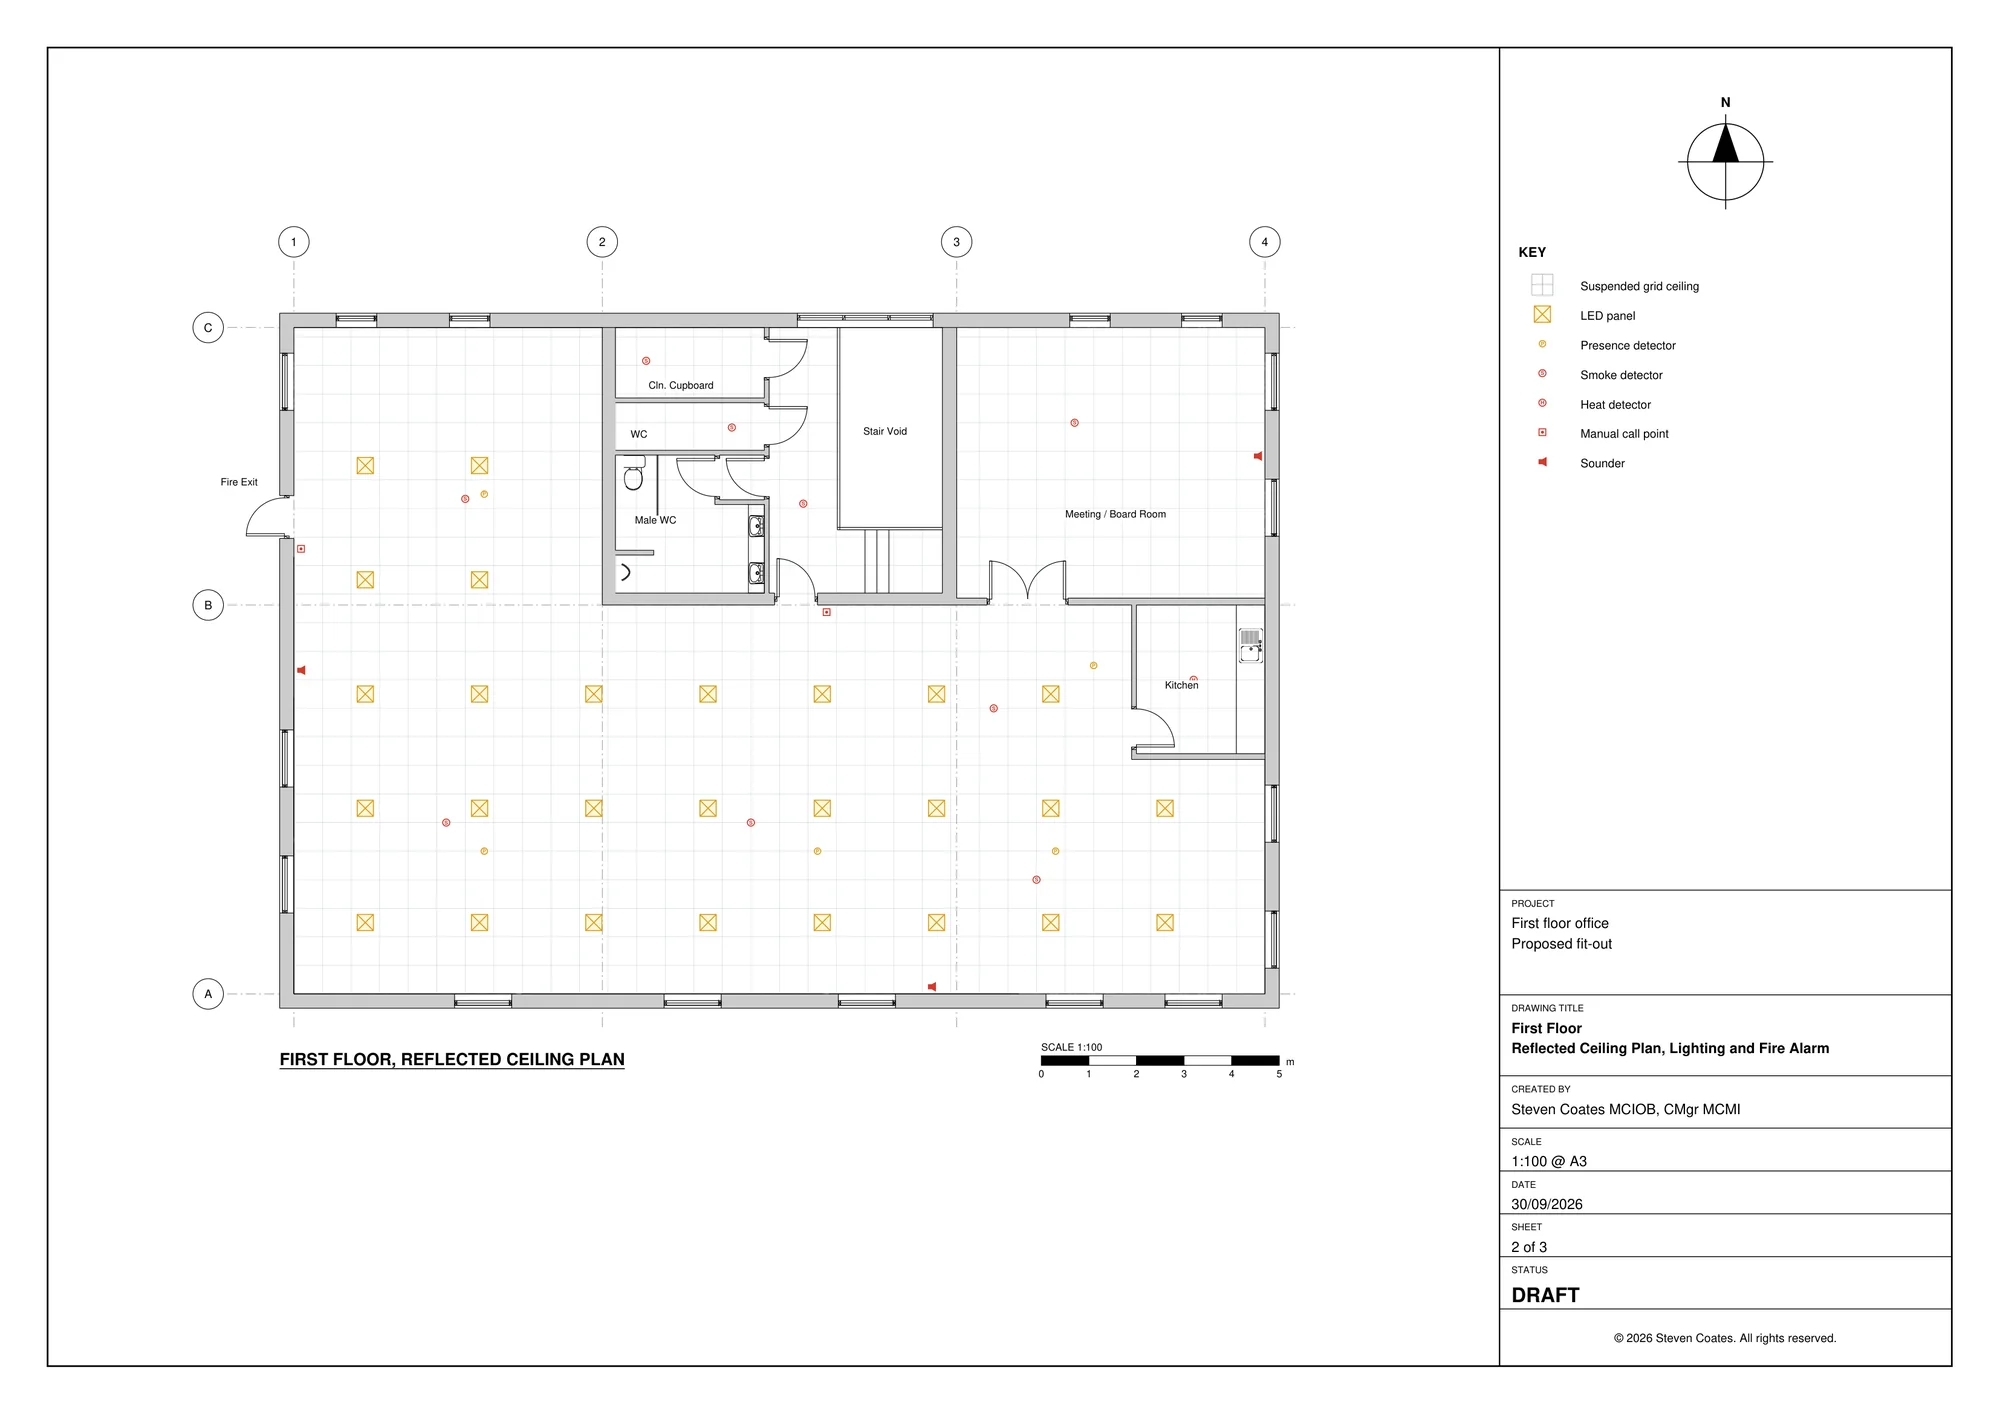
- Suspended grid ceiling with LED panels and presence detection
- Smoke detection, a kitchen heat detector, call points and sounders
- Windows modified to open for natural ventilation
03 What we documented
A drawing set for when it needs to be issued
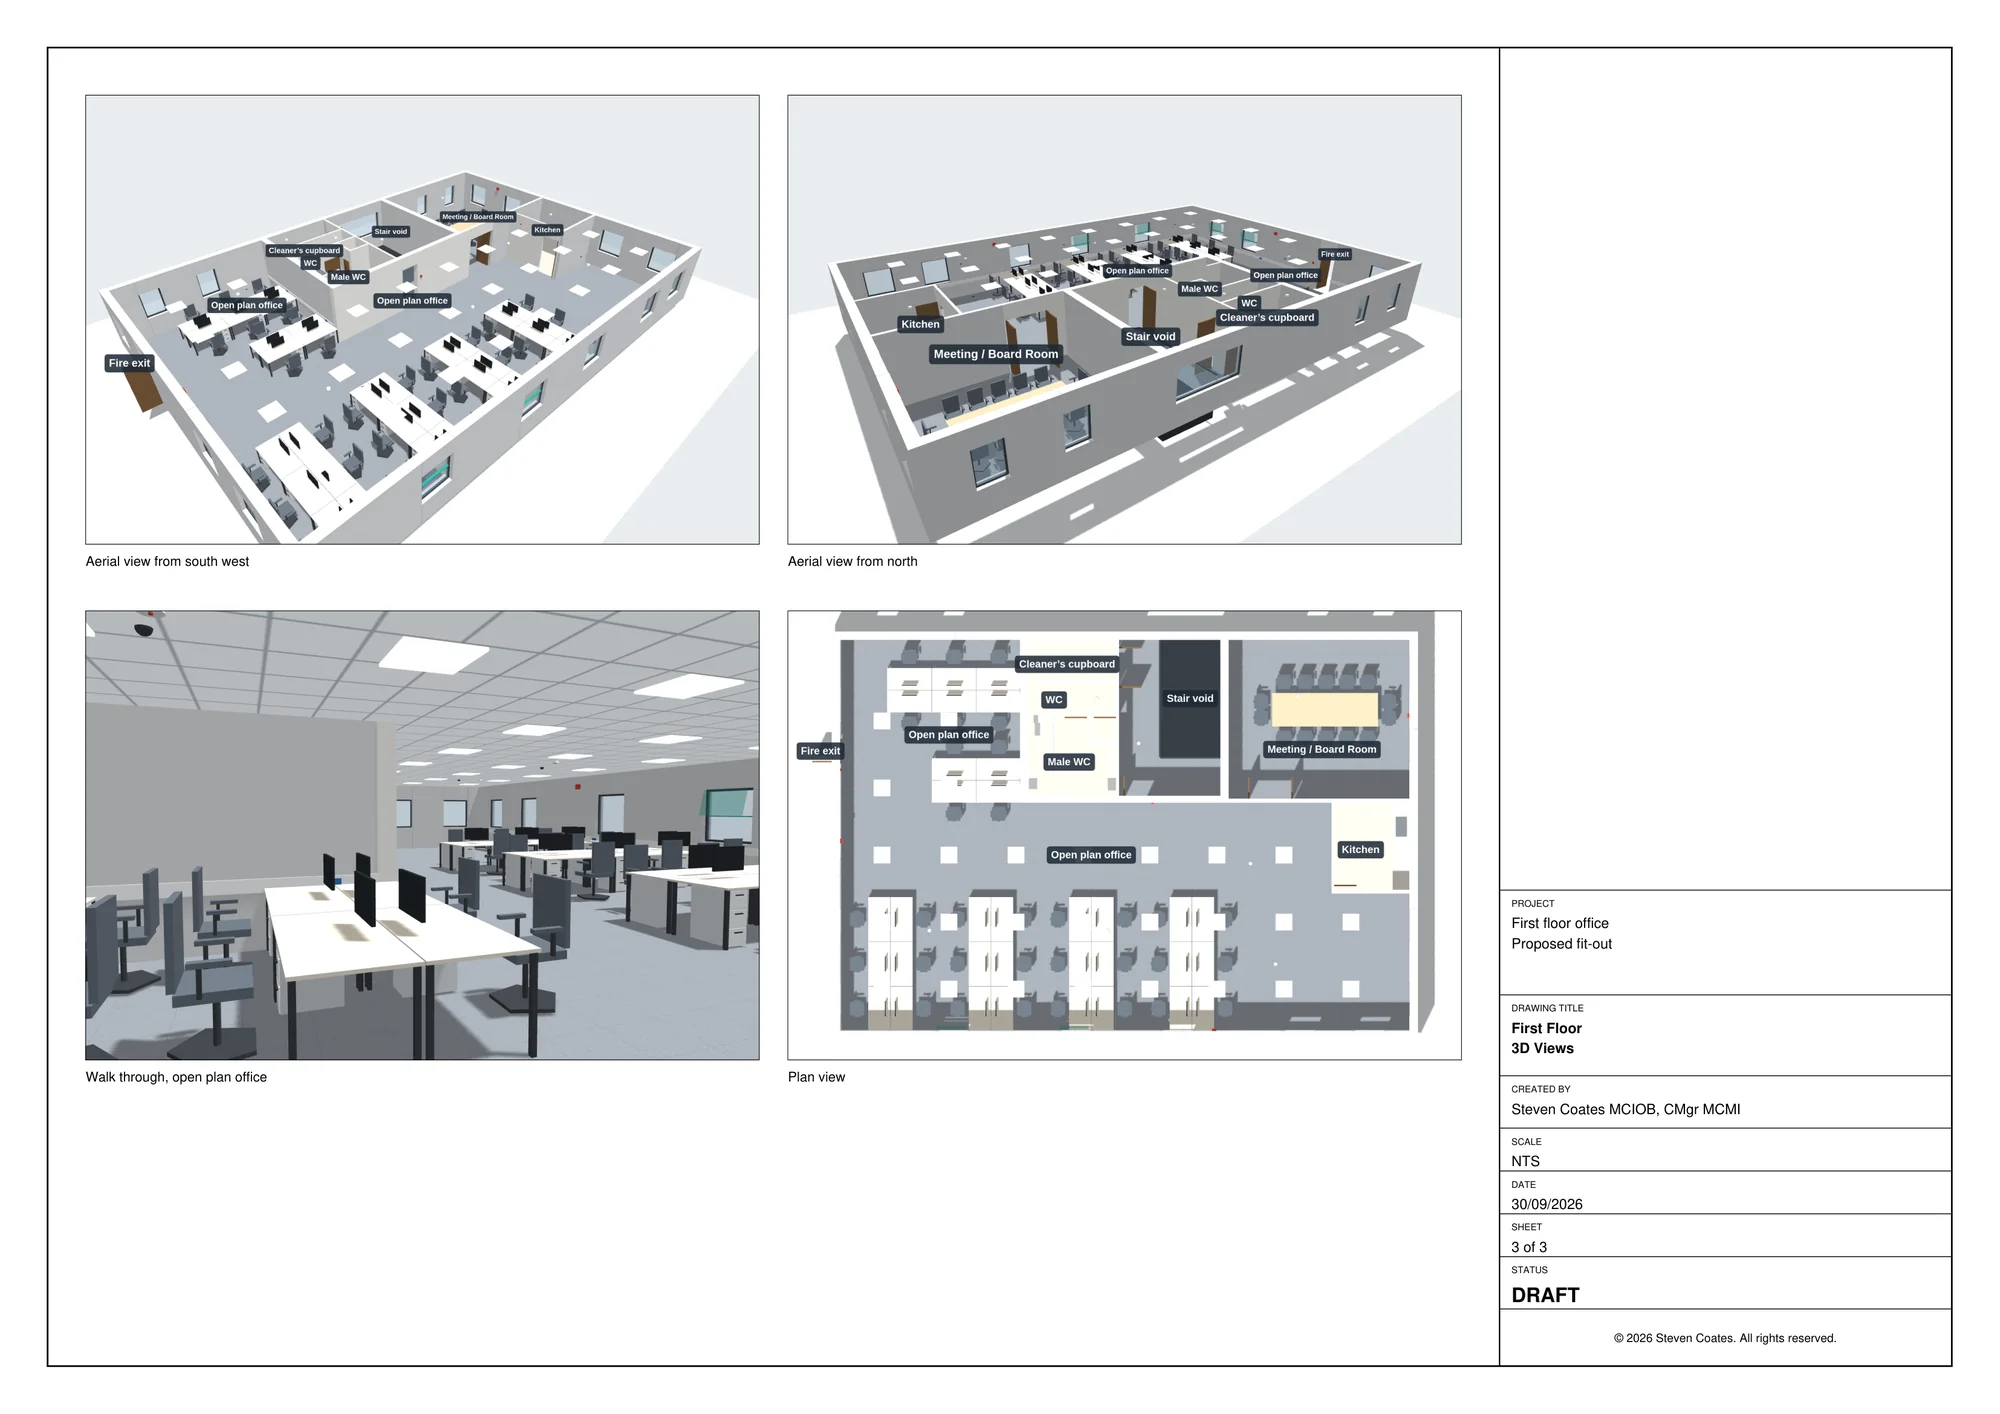
The layout was drawn up as a three-sheet A3 set: the proposed layout with furniture and small power, a reflected ceiling plan with lighting and fire alarm, and a sheet of 3D views taken from the model.
 (opens full size in a new tab)
 (opens full size in a new tab)
 (opens full size in a new tab)
04 What we built
The same information, as a place you can move through
The model was built from the same information as the drawings, so the drawing set and the 3D environment tell the same story. It runs in an ordinary web browser, with no software to install and no specialist knowledge needed to use it.
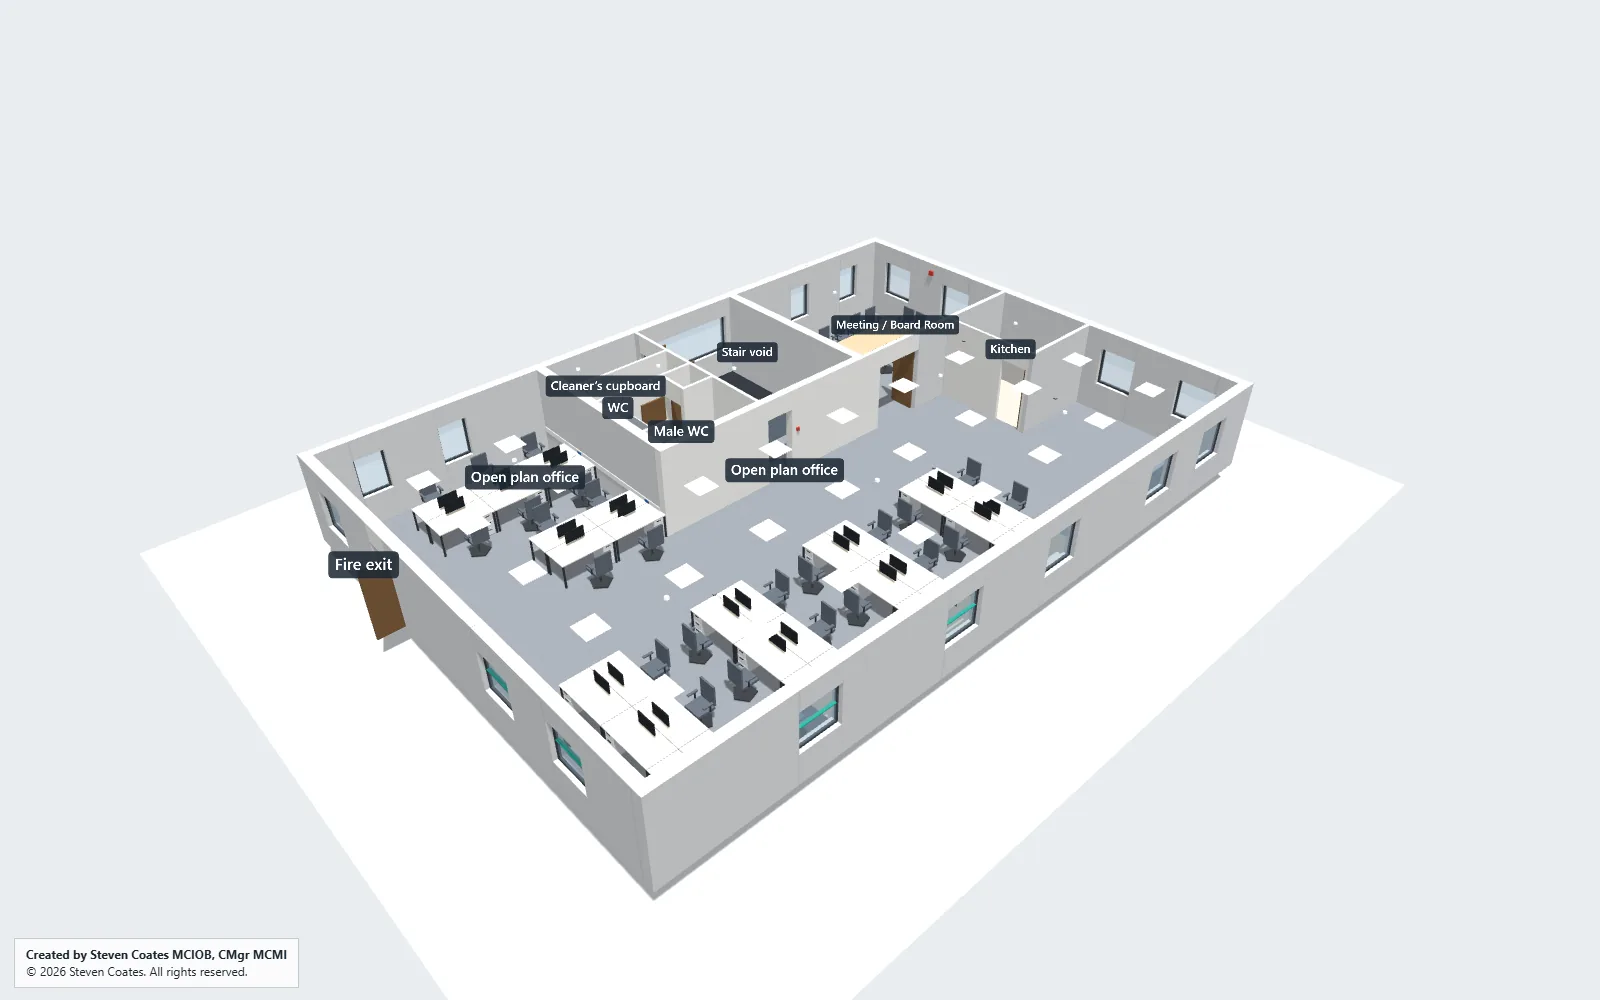
How to move: Aerial: drag to orbit, right-drag to pan, scroll to zoom. Plan: drag to pan, scroll to zoom. Walk through: W A S D or arrow keys to move, drag to look, hold Shift to move faster.
Model note: Services, fittings and heights are shown indicatively for coordination and comment. Refer to the drawings for setting out.
05 What you can do
Walk it, then take it apart layer by layer
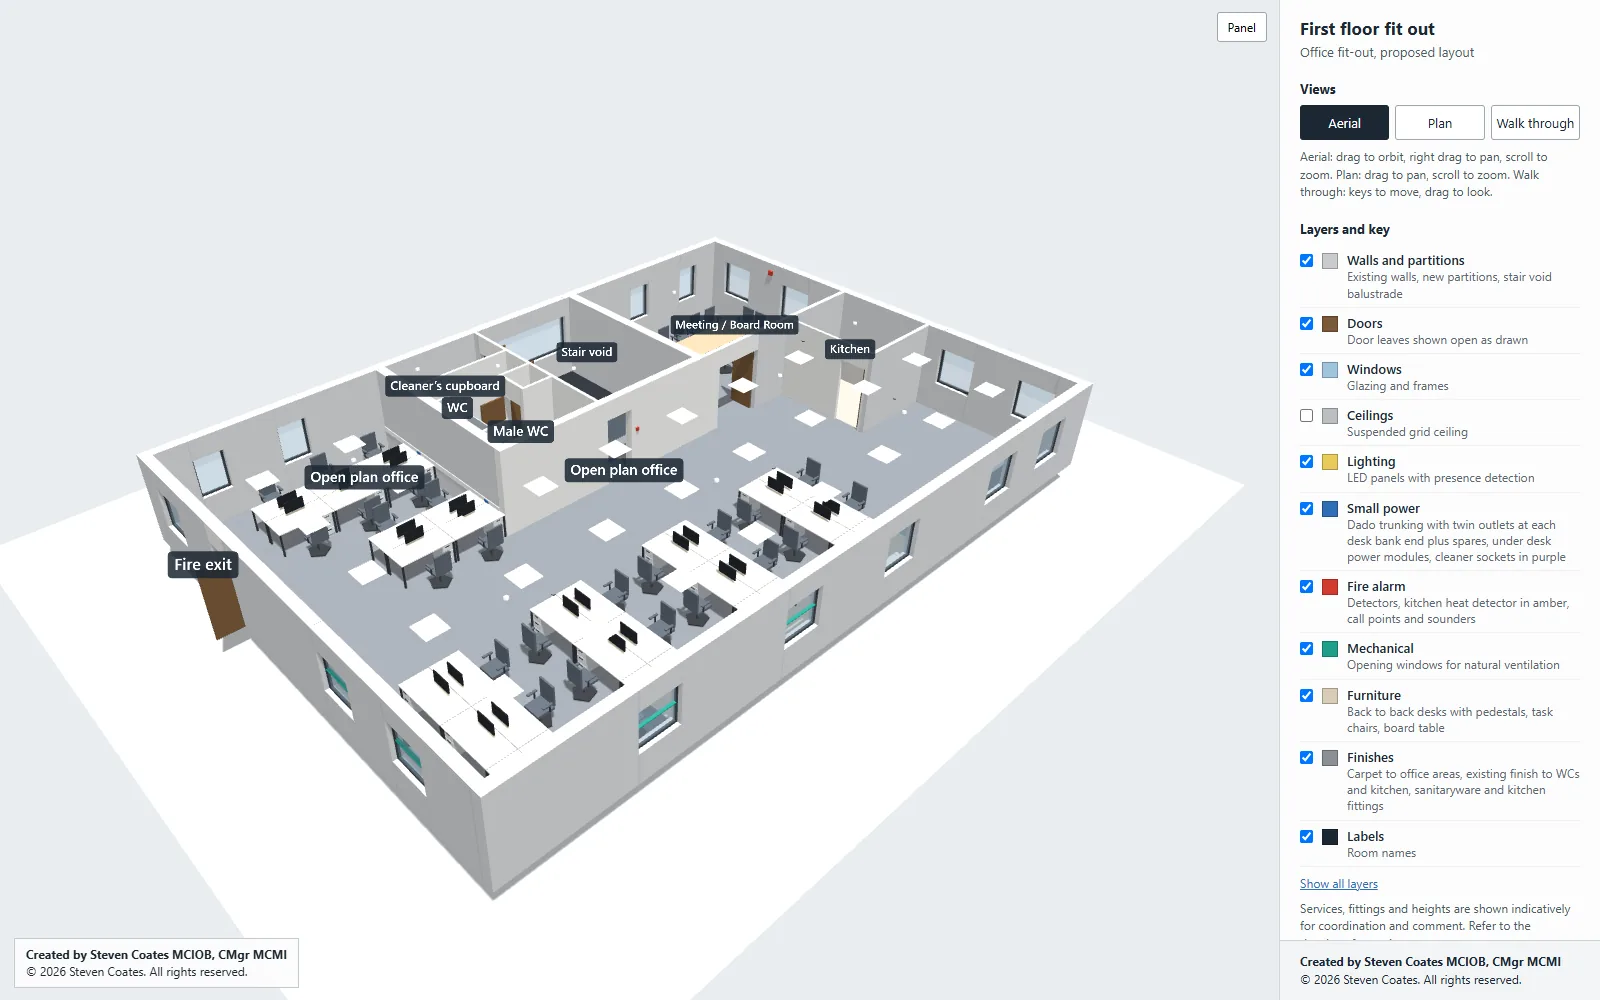
Start in the aerial view to see the whole floor, drop into plan to check the layout, then walk through at eye level. Turn off the ceiling to see the lighting and detection above the desks. Turn off everything except small power to see where every outlet lands.
- Aerial, Plan and Walk through modes
- Eleven layers: walls and partitions, doors, windows, ceilings, lighting, small power, fire alarm, mechanical, furniture, finishes and room labels
- Isolate one system to check it against the furniture layout
- Walk from the desks to the board room, kitchen and fire exit to understand how the floor connects
06 What it supports
What it helps a team decide
The value is not the model itself. It is that the people who will use, pay for and approve the space can understand it before furniture is ordered or partitions go up.
- Does the desk count and spacing work for the team?
- Is the board room in the right place relative to the open-plan area?
- Are power outlets where people will actually need them?
- Do lighting and detection positions make sense above the real furniture?
- Does everyone understand the proposal in the same way?
07 Notes and limitations
Technical notes
- Services, fittings and heights are shown indicatively for coordination and comment. Refer to the drawings for setting out.
- The model and drawings were issued as a draft for comment. They are presentation and coordination information, not a coordinated BIM model or a statutory design.
Start a project
Got something similar?
Send us what you have, even if it's a marked-up drawing or a rough sketch, and tell us what you need people to understand.